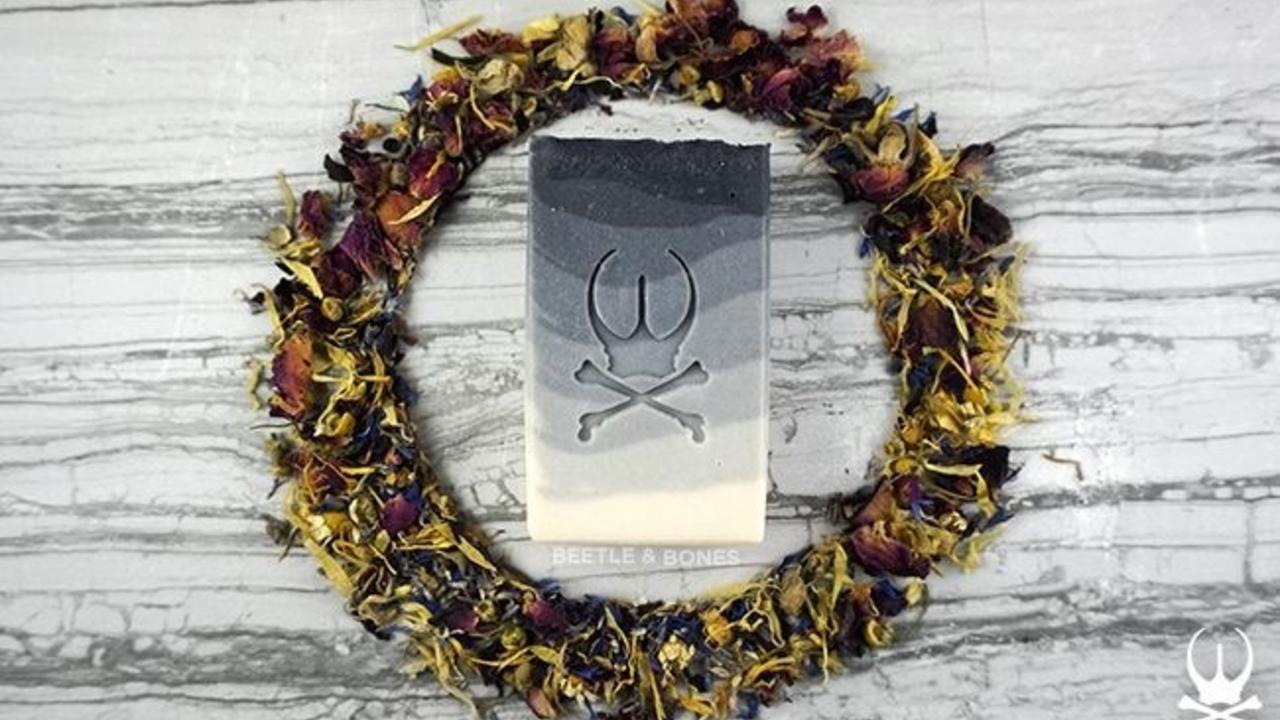
Tutorial: Modern Sandalwood Ombré Soap Recipe

The ombré trend is popular for good reason. It's timeless, a show stopper and looks so effortless, especially as a soap design. It is also a good way to see your colorant in action. I know I am not the only one that wonders how my new mica will look in cold process soap. Sometimes it's a mystery that just needs to be solved. This technique allows to you see how subtle your mica mixture can be, to full on intense.
For other ombré techniques in soap, check out the Natural Yellow Ombré Soap Recipe, Rainbow Ombré Soap Recipe, and this article with tips on accomplishing the gradient layers of an ombré soap.
 Tutorial:Modern Sandalwood Ombré Soap
This soap is sized for a 2.5 Pound Tall and Skinny Mini Basic Mold. You can resize it using a lye calculator for whichever mold works for you. As requested, the formula includes percentages for your convenience.
Modern Sandalwood Ombré Soap Recipe
- 2.5 oz Apricot Kernel Oil (8.2% of the oils)
- 2 oz Castor Oil (6.6% of the oils)
- 8 oz Coconut Oil (26.2% of the oils)
- 9 oz Olive Oil (29.5% of the oils)
- 8 oz Palm Oil (26.2% of the oils)
- 1 oz Sunflower Seed Oil (3.3% of the oils)
- 4.3 oz Sodium Hydroxide (5% superfat)
- 10.07 oz Liquid (I use 7.07oz Distilled water and 3 oz Coconut milk, 30% lye solution)
All soapmaking oils are purchased from Soaper’s Choice (Columbus Foods).
Fragrance Oil Used
- 1.5 oz of Indian Sandalwood Cybilla
This fragrance oil is from Bramble Berry, but feel free to use any fragrances or essential oils that your heart desires, just make sure it is a slow moving fragrance or essential oil.
Colorants Used
- 1 teaspoon Activated Charcoal
- 1 teaspoon Black Knight Mica
- 1⁄2 teaspoon Titanium Dioxide (Water Dispersible)
All colorants were purchased from Wholesale Supplies Plus, but feel free to use any colorants you like.
Additional Ingredients Used
- 2 teaspoon Kaolin Clay (Bramble Berry)
- 2 teaspoon Sodium Lactate (Bramble Berry)
PREP WORK: Slowly and carefully add the lye to the water and gently stir until the lye has completely dissolved and your solution is clear. Weigh out your soaping oils and set aside. I like to do these steps first to allow time for my lye solution and oils to cool down. (I recommend soaping around room temperature - 100° F).
Once your lye solution has cooled, add 2 teaspoons of Sodium Lactate and stir to dissolve. Sodium Lactate is a liquid solution that helps produce a harder bar of cold process soap and aids in the unmolding process. It should be used at a usage rate of 1 teaspoon per pound of oils.
To premix your colorants, use 1 tablespoon of a light liquid oil like sweet almond oil or apricot oil per 1 teaspoon of mica. You can also used 1 tablespoon of your batch oils, if you prefer. For this recipe, mix the activated charcoal and Black Knight Mica with 2 tablespoons of oil, 1⁄2 teaspoon of Titanium Dioxide with 1 tablespoon Distilled Water.
Measure out your fragrance. I like to incorporate the kaolin clay with my fragrance oil to help anchor the scent and to add slip to my soaps.
GET STARTED: To make even layers for the ombré design, you will need a measuring cup or beaker so you can pour the same amount of batter for each layer. Set this aside and place your stick blender into the cooled oils and burp it to release any air bubbles. Slowly add your lye solution to your oils and stick blend until emulsified.
Once emulsified, add the coconut milk into the batter and pulse to just combined. Then hand stir in the fragrance oil. You will want to work with a thin batter and let it naturally reach a thicker trace as you work. Do not use a stick blender to incorporate your fragrance oil, you may run the risk of thickening your batter too much where it will be difficult to work with near the end of the ombré .
POUR IT / SWIRL IT: Add the water dispersed titanium dioxide mixture to the entire batter to brighten it up a bit, you can skip this step if you would like to work your natural batter color.
After this step, pour a small portion of your batter into your measuring cup (remember this amount because you will use this same amount for each layer).

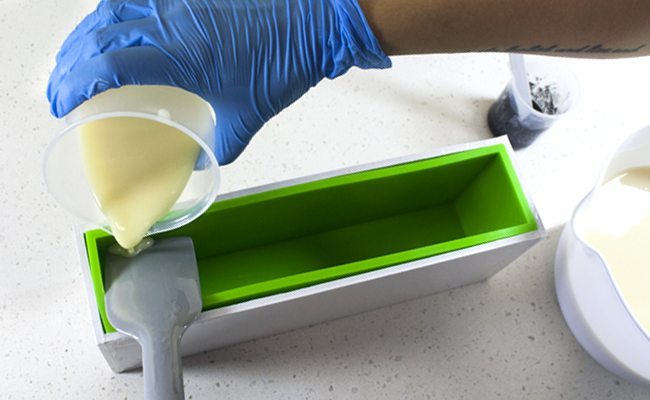
Slowly add your first layer of ombre soap!

Slowly pour the first layer of your ombre soap using your spatula and the wall of the mold to control the soap.
To begin pouring your batter, you will be using the wall pour technique. Place your spatula against one side of the mold and slowly pour the batter on top of it as you move your spatula against the side of the mold. Do this until your measuring cup is empty of raw soap.
Next, add 1⁄2 tsp of your mica at a time into the batter for each layer and mix until combined.
 Add a small portion of your predispersed mica mixture into the remaining raw ombre soap.
Repeat the coloring and pouring process against the side of the mold until all your raw soap has been used. By doing this, you will be building up the intensity of the ombré soap colors from lightest to darkest.

Slowly pour the second layer of the ombre soap, again using your spatula and the mold wall to break the surface tension.

The final layer of the ombre soap! Rinse and repeat each previous step until you've filled your mold!
FINISHING UP: After tapping down your mold to release any trapped air bubbles, finish off the top any way you please. I like to keep it simple to really let your ombre design be the show stopper!

Optional: clean up the inside wall of your mold after pouring the soap to ensure the nice clean ombre effect from side to side.
Spritz the top with isopropyl alcohol to help avoid soda ash and insulate for 24 hours. Carefully remove from the mold and cut into bars allowing the soap to cure for 4-6 weeks.
 Finished Modern Sandalwood Ombre Soap!
Watch the making of this soap before you try it yourself!
This sandalwood ombre soap recipe featured in this tutorial is a vegan-friendly soap formula. Unlike many other Modern Soapmaking tutorials, this soap recipe is not a palm-free formula. It used a 5% superfat and a 30% lye solution. Feel free to adjust as necessary!
Want to snag weekly advice on building a successful soap biz directly in your inbox?
Of course you do! Sign up for our newsletter below for more tips and tricks to make bank in your biz.

